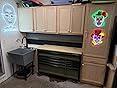
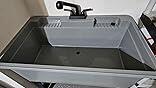
Installing a new utility station in your laundry room doesn't have to involve expensive plumbing fees or tearing open your walls. If you already have a washing machine in the room, you already have the water supply and drainage infrastructure you need.

Connecting a freestanding utility sink directly to your existing washing machine hookups is one of the easiest DIY projects you can tackle. By using simple brass adapters to share your water source, you can have a fully functional, heavy-duty wash station up and running in about 30 minutes. Here is a step-by-step guide to setting up your sink, along with common troubleshooting tips to ensure a watertight installation.
What You Need for the Installation
Before you begin, gather these basic tools and plumbing components. Having everything on hand keeps the process smooth and quick.
-
Y-Splitters (2): Dual-outlet brass hose splitters with individual shut-off valves (one for hot water, one for cold water).
-
Braided Stainless Steel Supply Hoses (2): Heavy-duty water lines to connect the splitters to your sink faucet shank fittings.
-
Drain Hose and Hose Clamps: High-flex drainage tubing to route water from your sink's P-trap into the existing wall standpipe.
-
Adjustable Wrench or Channel Lock Pliers: For tightening hose connections without stripping the fittings.
-
Teflon Thread Seal Tape: To ensure a watertight seal on all threaded male connections.
-
Bucket and Towel: To catch residual water sitting in your washer lines when you disconnect them.
Step 1: Shut Off and Locate Your Water Valves
Start by locating the main hot and cold water shut-off valves mounted on the wall behind your washing machine. Turn both valve handles completely clockwise until they are fully closed.
Place your bucket and towel directly underneath the connection points. Slowly unscrew the existing washing machine supply hoses from the wall valves. A small amount of trapped water will trickle out of the hoses, which is completely normal. Set the hose ends into the bucket while you work on the valves.
Step 2: Attach the Y-Splitters to Share Water
To run both your washing machine and your new utility sink from the same water source, you need to split each supply valve into two separate outlets.
Wrap the male threads of your hot and cold wall valves with two or three turns of Teflon thread seal tape. Thread a brass Y-splitter onto the hot water valve and hand-tighten it until snug. Give it an extra quarter-turn with your adjustable wrench to secure the seal, being careful not to over-tighten and crack the internal rubber washer. Repeat this exact process for the cold water valve.
Once both splitters are attached, reconnect your washing machine's original hot and cold intake hoses to one side of each Y-splitter.
Step 3: Connect the Supply Lines to the Sink Faucet

With the Y-splitters installed, you can now connect the water lines to your utility sink faucet.
Apply Teflon tape to the open male threads on the remaining outlets of both Y-splitters. Attach your new braided stainless steel watersupply lines to these open ports. Run the opposite ends of the hoses to the threaded hot and cold faucet shanks located underneath your utility sink basin. Hand-tighten the coupling nuts onto the faucet shanks, then use your wrench to secure them firmly in place.
Double-check that the hot water line feeds the left faucet handle and the cold water line feeds the right handle so your water controls function correctly.
Step 4: Route the Drain Hose to the Standpipe
Your washing machine empties its wastewater into a dedicated wall standpipe or laundry tub drain. You can route your utility sink's drainage directly into this exact same outlet.
Assemble the plastic P-trap kit included with your utility sink and attach it to the tailpiece beneath the basin drain strainer. Slide a flexible rubber or vinyl drain hose onto the discharge outlet of the P-trap, securing it with a stainless steel hose clamp. Route the open end of the hose straight into your wall standpipe alongside your washing machine's discharge hose.
Ensure the drain hose inserts several inches down into the pipe so high-volume water flow won't push the hose back out. Use a plastic zip tie to secure both the washer hose and sink drain hose directly to the standpipe housing so they remain firmly locked in place.
Step 5: Test for Leaks and Adjust Connections
Before sliding your sink fully against the wall, you need to pressurize the system and verify every joint is completely sealed.
Slowly open the main hot and cold wall shut-off valves. Check the Y-splitter connections and faucet shanks immediately for any water droplets. Next, turn on your utility sink faucet handles to purge air from the lines and let water run freely into the basin for two to three minutes. Inspect the under-sink P-trap, hose clamp joints, and standpipe entry point for subtle micro-leaks.
If all connections remain completely dry, push your freestanding utility sink into its final resting position. Turn the adjustable feet on the bottom of the sink legs until the top rim sits completely level against your wall.
Common Issues and Quick Fixes

Even straightforward plumbing projects can encounter minor hiccups. Here is how to handle the most common issues:
-
Low Water Pressure at the Faucet: If the water stream feels weak, check the shut-off levers on your brass Y-splitters. Ensure both levers are turned completely parallel to the hose direction so the internal ball valves are fully open.
-
Slow Basin Drainage: A slow-draining sink usually means the drain hose is inserted too far down into the wall standpipe, creating an air lock. Pull the drain hose up slightly to ensure air can circulate freely out of the standpipe while water empties.
-
Dripping Threaded Connections: If you notice a slow drip at a hose fitting, turn off the water valves, unscrew the fitting, and inspect the rubber washer inside. Reapply fresh Teflon tape around the male threads and tighten the connection firmly with your wrench.
Ready for Action in 30 Minutes
Hooking up a utility sink to your existing washing machine lines eliminates complicated retrofitting work and lets you add heavy-duty functionality to your laundry room in a single afternoon. By sharing your existing supply valves and drain stack, you get immediate access to running water for soaking clothes, rinsing messy tools, and keeping your home clean.
Find your perfect sink at Utility Sink.